Adding a new Accrediting Agency
This documentation is relevant if you establish a new relationship with a licensing board and would like to add support for license collection and earned accreditation issuance to your platform.
In order to get the new board to appear to users as an option in their license interface and issuing certificates, you'll need to set up the Accrediting Agency and at least one Accreditation. Both steps are covered here.
1. Add the Accrediting Agency
Navigate to Tangible Cred -> Accrediting Agencies in your WP Admin. Click the "Add New Accrediting Agency" button at the top of your screen. You'll arrive on a rather large new post form.
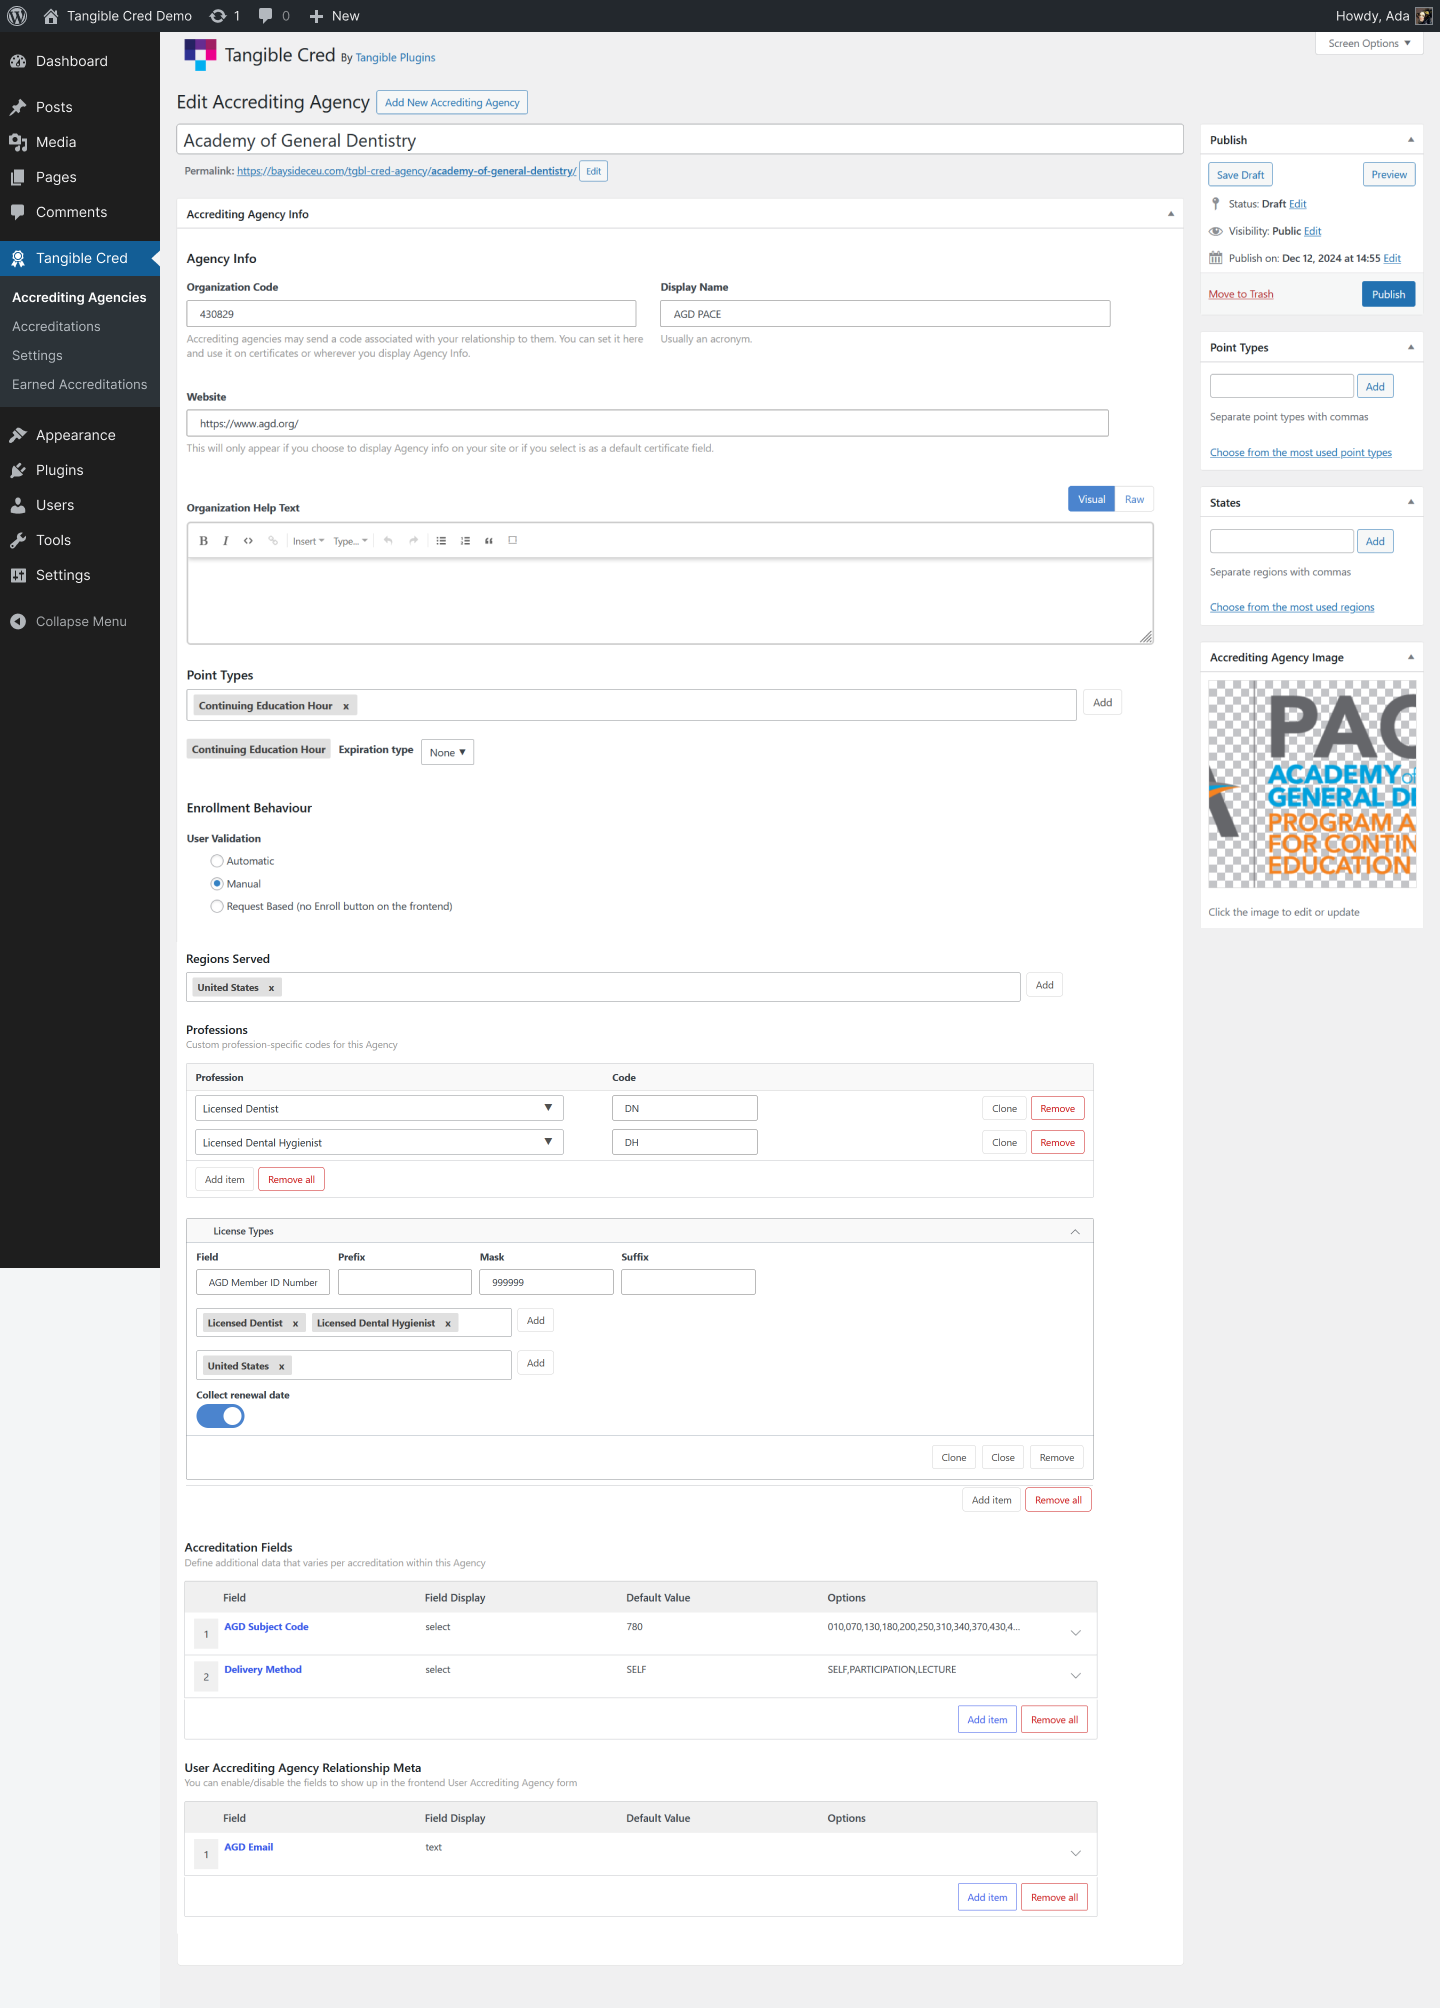
1.1 Agency Info
Fill out the title at the very top of the page. This is meant to represent the true, full name of the agency.
The Organization Code field must have a value. Some licensing and certifying boards will supply you with a code or number that represents your relationship with them as an approved accredited course provider. If you don't have one, you can supply a string instead, or a few zeros. The Display Name will be used in areas of the frontend where a shortened name is needed due to space constraints.
Currently, the Website and Organization Help Text fields do not display in any Tangible Cred-provided UIs, however they are stored in the database and can be fetched in custom certificate templates and post templates using the meta keys website and description respectively.
At this point, you may also want to fill out the "Accrediting Agency Image" field, supplying the board's logo. This is stored as a WP featured image and is used in certificate templates.

1.2 Point Types
On simple sites, point types is fairly straightforward to set up on new accrediting agencies.

It's just a matter of clicking the "Add" button to the right of the input and selecting your configured point type from the dropdown. In cases where your courses are all weighted using the same scale you'll likely only have one point type configured in Tangible Cred's settings.
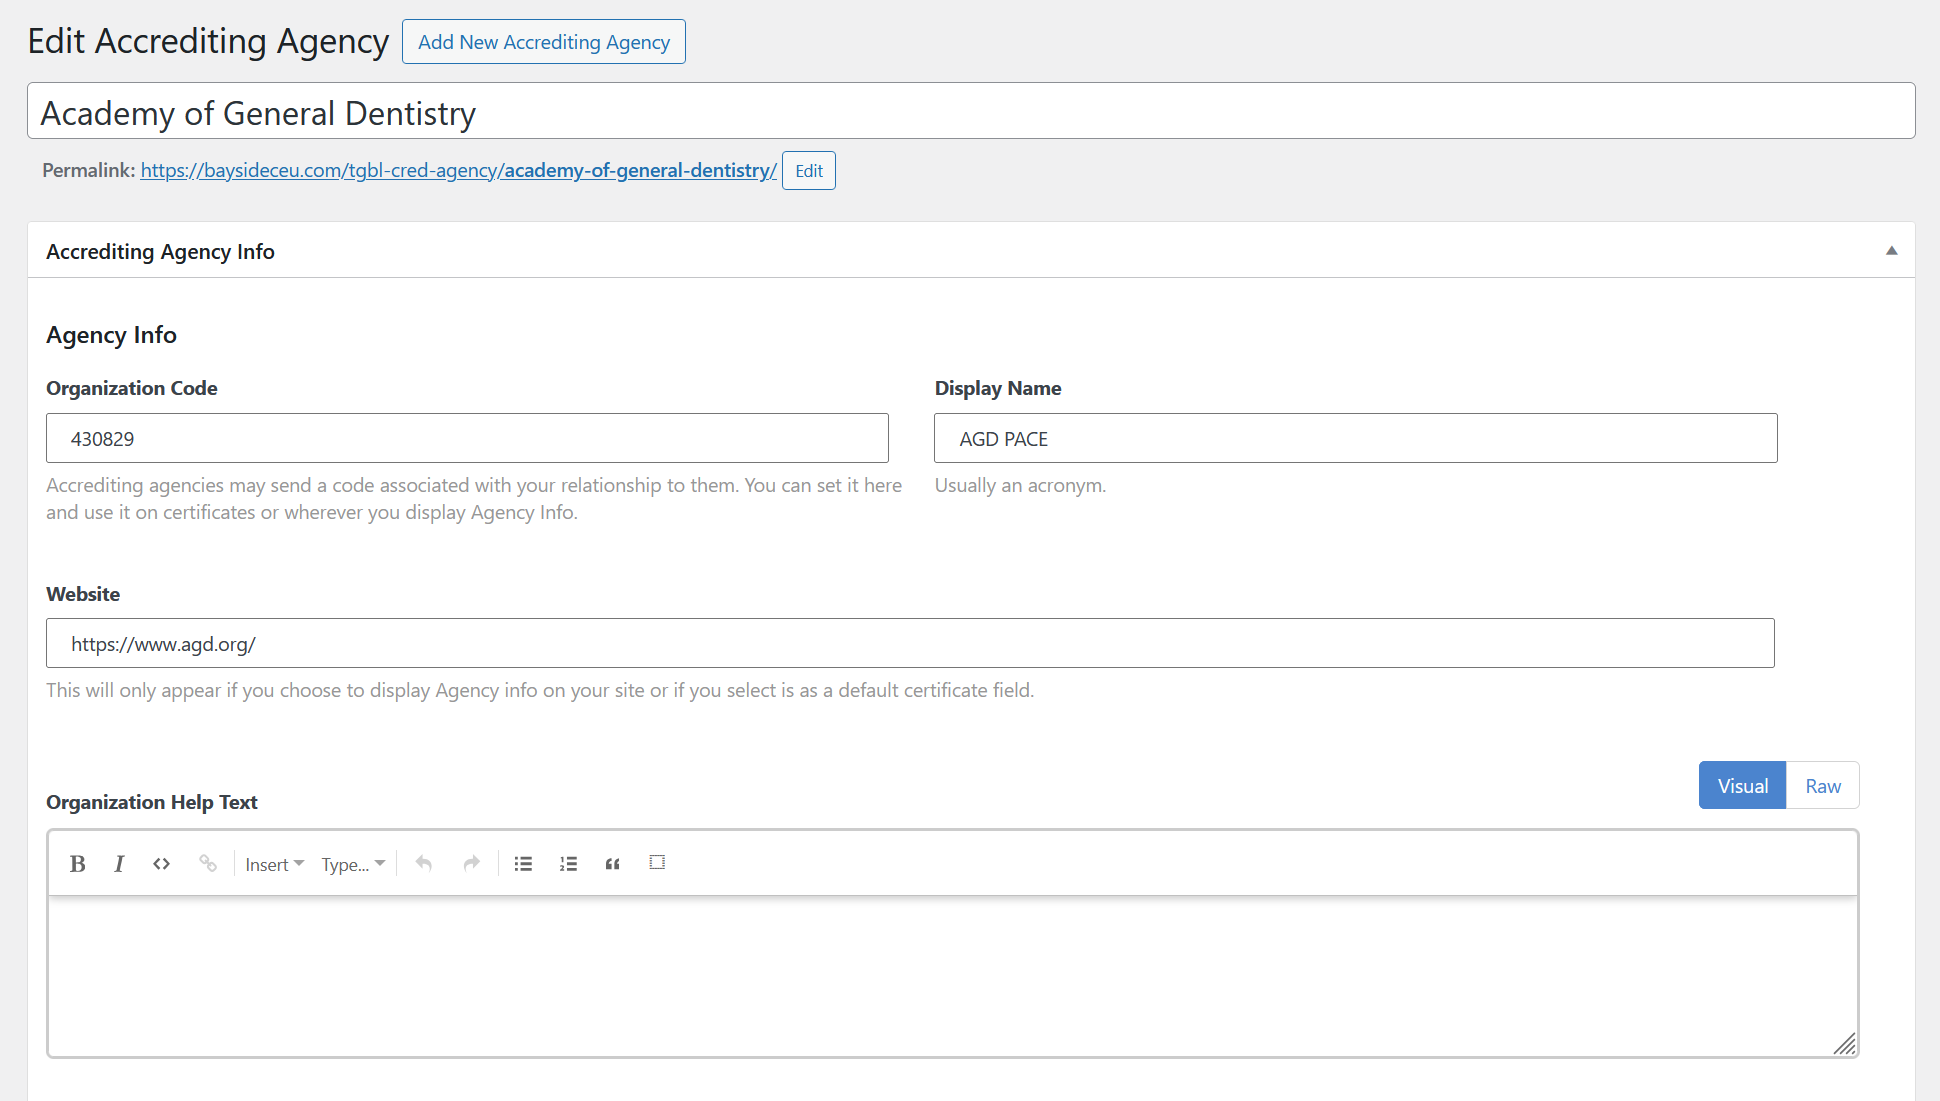
From here, you can optionally set up recurring or scheduled expiration rules for points issued by this agency by selecting an "Expiration type" next to the point type form that appears when the point type is added to the agency.
Currently this setting has no impact on the rest of the system. In the future it will be used to test a user's earnings to determine whether they count towards the current renewal cycle. This form currently doesn't support recurrence relative to a user's inputted license renewal date, this functionality is in our backlog.
1.3 Enrollment
This section is meant to define how a user goes about forming a relationship with the agency. Agencies set to "Automatic" will force relationships with all users by default. "Manual" allows the user to self-enroll. "Request Based" disables self-enrollment.

1.4 Regions and Professions
Regions and professions are metadata used for reporting, and eventually will be involved in filtering relevant content and agencies for users in the frontend.
Region associations are fairly simple. Click "Add" to the right of the input and select the regions that apply. Available regions are configured in Tangible Cred -> Settings -> Data Setup -> Regions. Some regions are configured as parent "Zones" representing groups of regions. When these are selected, they apply all child regions (ie. selecting United States would comprise creating a relationship with all 50 states configured as child regions, but this relationship will be simplified in the UI where relevant to avoid listing 50 regions).

Professions have an added layer of supporting a professional code specifically for the accrediting agency. This is relevant because some state licensing boards may use code "R" for example for Registered Nurses, while the rest (more sanely) use "RN". This way the professional code used in reporting and displayed to users to select when configuring their relationship with the board reflects the one used by the agency.
To add a profession, click the "Add item" button at the bottom of the "Professions" section. Select the profession configured in Tangible Cred -> Settings -> Data Setup -> professions from the dropdown, and type the code into the provided input. You can add as many relationships with professions as you like, but you can only supply one code per profession.

1.5 License Types
License types are configurations that determine what licenses a user can enter when setting up their relationship with an agency. When an agency has a consistent ruleset for license formatting (the same prefixes, suffixes and rules for masking), this can be configured as a license type associated with all agency professions and regions. When rules vary, multiple license types can be created to accomodate these different formats.
Prefix and suffix values are automatically prepended and appended to a users' inputted license key when they save it. This means they can't mess around with formatting! The mask field allows you to limit the amount and type of characters a user can insert into the license field.
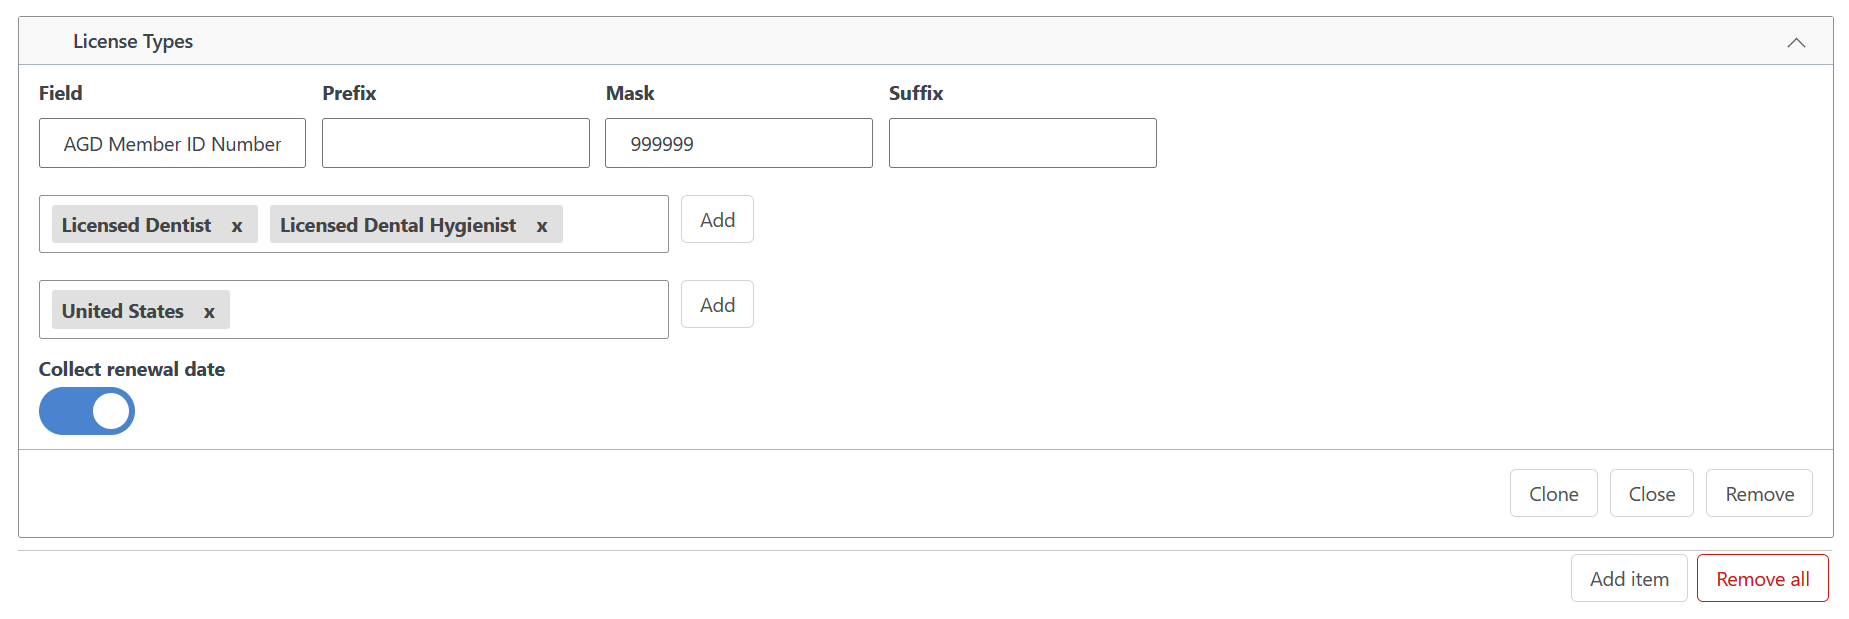
The mask field supports the following characters:
*a letter or a number9a numberAa letter- other characters are treated as non-optional formatting, so if the format were 10 digits separated by a dash in the middle your mask value would be:
99999-99999. This functionality hasn't been extensively tested yet, so for now sticking to license template masks with letter, number, and alphanumeric slots is suggested.
Modifying masks to change existing characters after users have already submitted license values is not suggested, as the changes could cause their submitted licenses to appear strangely in the frontend license management form, and their license would need to, in some cases, be reinput to be saved properly. Likewise, deleting license templates wholesale which have already been used by users could cause unexpected effects.
1.6 Accreditation and User Fields
Accreditation and user relationship fields are entirely optional. These can be used to configure new datapoints that can be associated with accreditations and user relationships associated with the accrediting body.
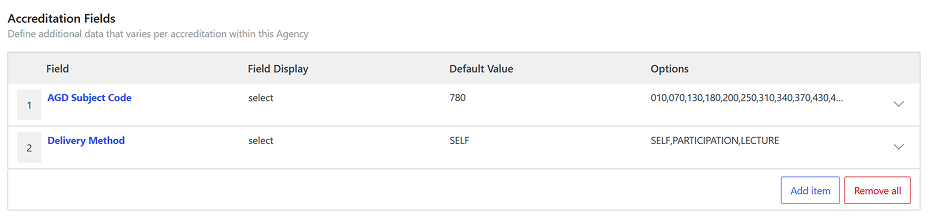
Accreditation fields are expected to have more use than user-agency relationship meta, as the license type, region and profession handle the bulk of information expected to be collected specific to the user's relationship with the agency, however in some cases additional information may be needed for reporting purposes, such as the email address the user supplied when setting up their account with their licensing board.
Both field configuration interfaces support text, select, number, and mask values. When configuring options for a select-type field, the options should be separated by commas, without trailing spaces.
The mask field display type follows the same rules as the license mask.

2. Add an Accreditation
In order to issue earnings, your newly-added agency must be associated with at least one accreditation, which is a template that contains earning event rules that determine how many points are issued when certain criteria are fulfilled by a user.
Navigate to Tangible Cred -> Accreditions in your WP Admin. Click the "Add New Accreditation" button at the top of your screen. You'll arrive on another rather large new post form.
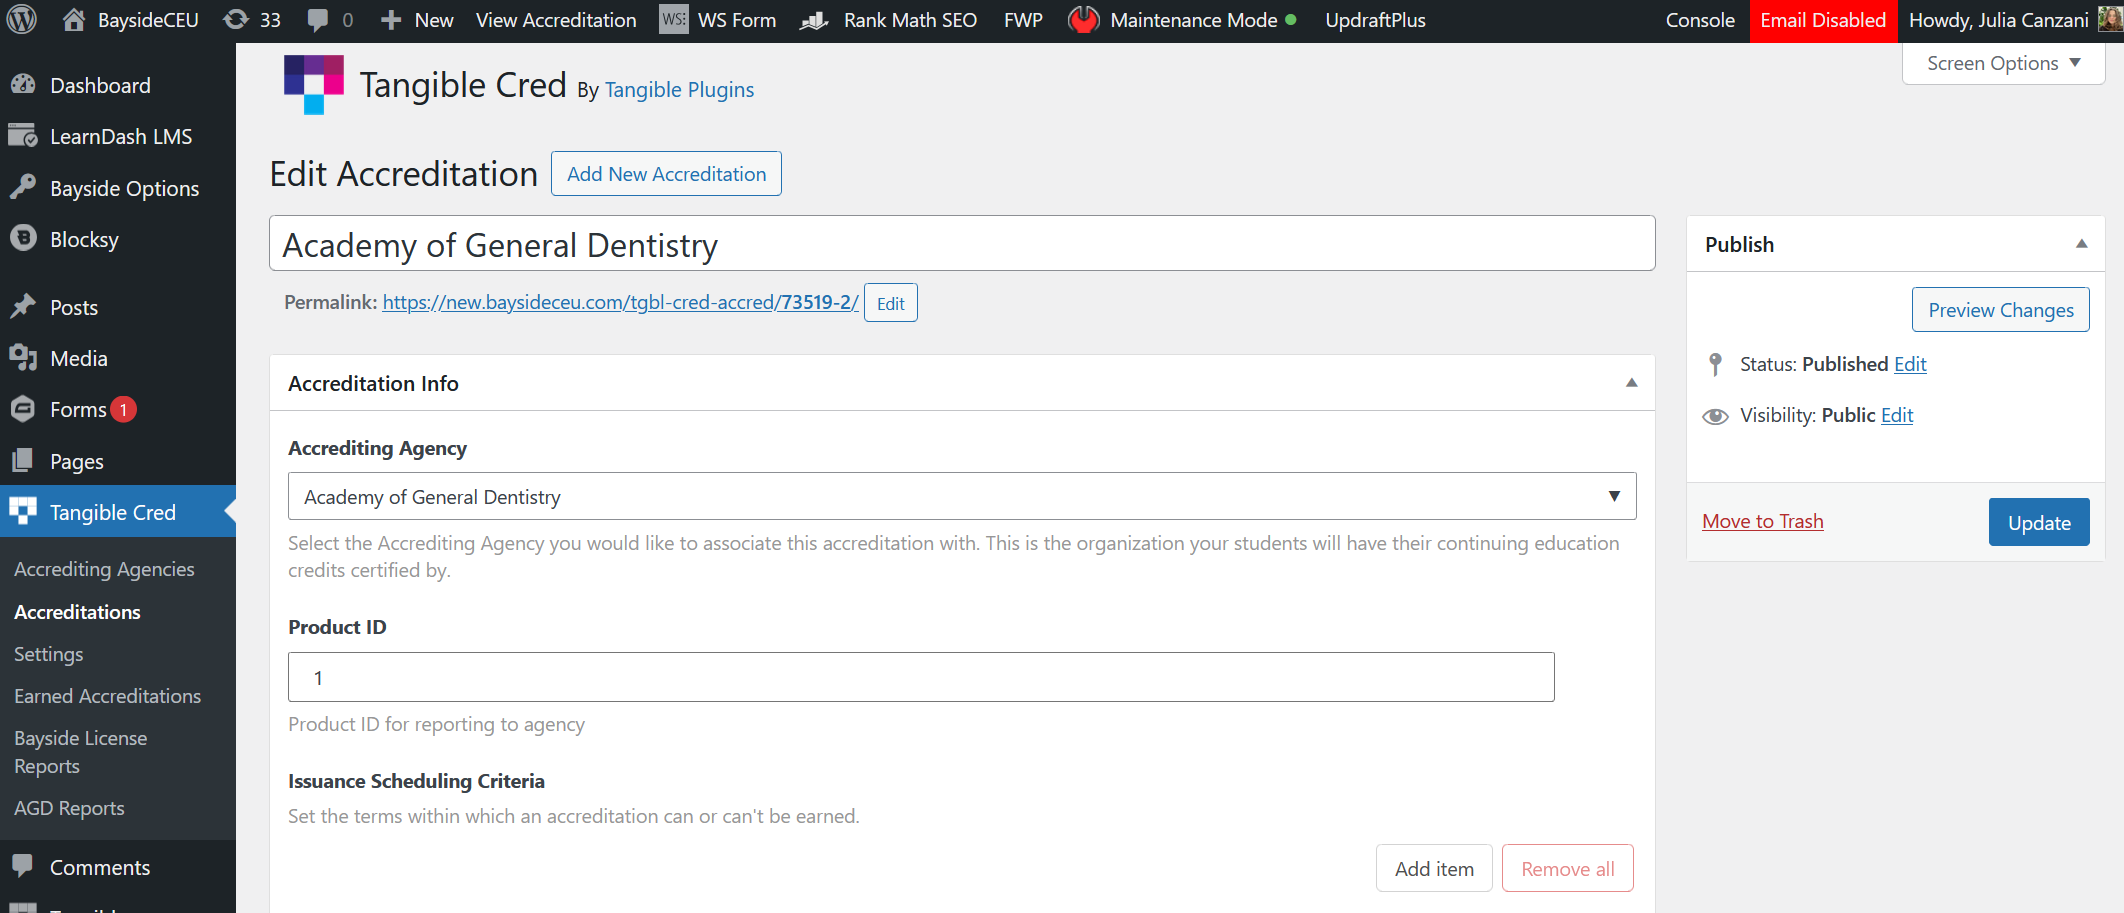
2.1 Accreditation Info
Name the accreditation meaningfully so that you can easily find it when searching for it from other admin locations such as on the form for making associations from the course context.
In simple setups there may only be one accrediation per accrediting agency, and in these cases it often makes sense to name them identically.
Select your newly-added agency from the Accrediting Agency dropdown. If you do not see it, make sure it is set to "Published" and reload the form.
The Product ID setting is required, and in more complex use-cases may be used for reporting purposes. It is meant to contain a code global to all of the courses associated with the Accreditation via Earning Issuance Criteria.
2.2 Issuance Scheduling Criteria
Optionally set Issuance Scheduling Criteria to determine the frequency with which users can re-earn the accreditation.
This feature has not been tested extensively, and so for now it's suggested to leave it empty.
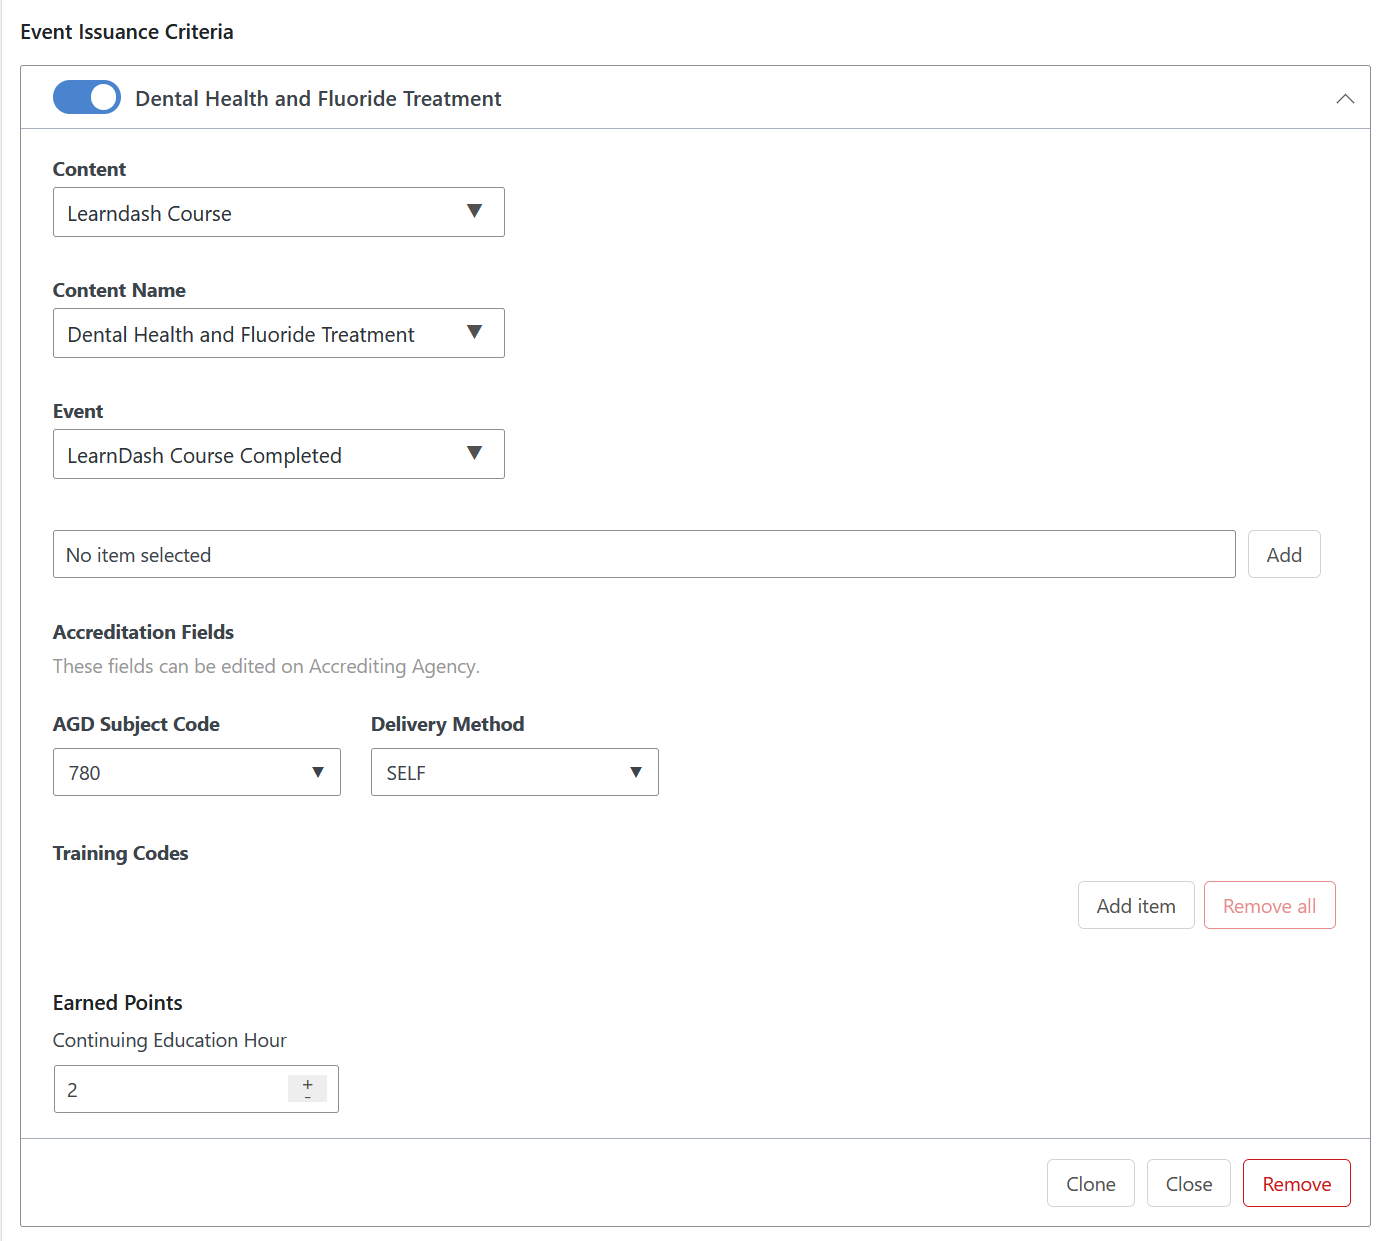
2.3 Event Issuance Criteria
Courses are associated with the accrediation as Event Issuance Criteria. Course completion will be the main trigger for the earning event and is currently the only supported trigger (outside of new user-agency relationships, which backfill accreditations that should have been earned based on a user's historical course completions).
The issuance criterion can be further filtered by profession: thus being made available only to users who have a specific profession. This may make sense for courses specifically geared to specific types of professionals. Only use this setting if you need to restrict issuance based on profession. By default earning events have no restrictions set on which professions can earn them.
Each Event Issuance Criterion contains its own values for earned points and accreditation fields configured on the associated Accrediting Agency. Criteria may also be configured with static or scheduled accreditation codes, as some licensing boards require frequent updates to codes associated with approved courses.